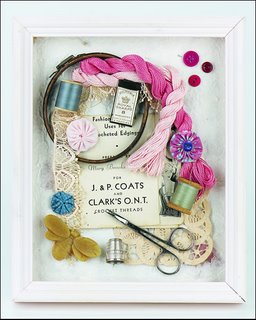
Sewing materials and tools are just pretty! Many of the tools of sewing end up being valuable collectibles, but why not show off your love of sewing with a framed collage? Don't want to give up your special memorabilia? Just visit a few thrift shops, flea markets or garage sales to gather up the interesting pieces for your collage.
Materials
Shadow box frame (deep frame)
Acrylic paint of your choice to paint frame
Specialty paper as background (or your favorite fabric!)
Notions: charms, buttons, threads, old scissors, scraps of lace, anything related to sewing
Glue
Shadow box frame (deep frame)
Acrylic paint of your choice to paint frame
Specialty paper as background (or your favorite fabric!)
Notions: charms, buttons, threads, old scissors, scraps of lace, anything related to sewing
Glue
Instructions
Paint the shadow box frame if purchased unfinished. Select a paint color that coordinates with the colors of your collage elements. Generally, the frame should be lighter than your darkest color of element. The frame is not the focus of the design and should not stand out more than the collage.
The lace and doily used in this collage were tea dyed to soften the white of those items. To tea dye, make a strong cup of tea using several tea bags; dip lace and doily into the brew for 15 minutes. Allow lace and doily to air dry and then iron.
The first step to create a collage is to just play with your elements. Try different arrangements until happy with the overall design look. This collage took me 2 hours to design and less than 5 minutes to glue! The time spent in "perfecting" the elements is fun and worth every minute!
Take a good look at your finished design. Sketch, write notes, take a picture. Anything that will help you remember placement.
Glue, starting with the bottom-most elements. Allow 24 hours to dry. Put together the frame and hang your masterpiece!
**This article was taken from the 501 Sewing Secrets Newsletter, you may sign up here.


This is so pretty!
ReplyDeleteWhat a great idea!!! I might try this to hang up in my new little sewing nook.
ReplyDelete